Today I spent an entire day trying to generate usable storyboard panels for Scene 1 of our movie. One scene. Nine panels. Eighteen images (start and end frames for each shot). How hard could it be?
Pretty hard, it turns out. Here's everything I tried, everything that went wrong, and what I actually learned.
The Problem
Our existing storyboards were garbage. Characters drifted between panels — different faces, different outfits, sometimes completely different people. The backgrounds changed randomly. They were rough sketches generated months ago with basic text-to-image prompts and zero character references. You couldn't actually use them for anything.
What I need are start and end frames for each shot that I can feed directly into a video generation model. That means: accurate characters based on our approved designs, consistent environments, Pixar-quality rendering. No drift.
Attempt 1: Text-to-Image with Character References (Gemini 2.5 Flash)
The first thing we tried was image-to-image generation with Gemini, passing our approved character turnaround sheets as reference images alongside text prompts. The idea: show the model what each character looks like, tell it what scene to generate.
An agent wrote a script, ran it, and produced 18 panels. They were... not great. Square aspect ratio (not 16:9). Characters with wrong outfits. Jenny was blonde (she's not — more on that later). Some panels were just empty rooms with no characters at all.
Left: Jenny was supposed to be here but this is... not Jenny. Right: Gabe in a flannel shirt instead of a tuxedo.
The Jenny Incident
This one really annoyed me. Our screenplay described Jenny as "about 15, blonde, with her hair back in a ponytail." But at some point we changed the character design. The approved turnaround shows Jenny with dark brown curly hair and brown skin. Nobody updated the screenplay or the storyboard prompt files.
So multiple rounds of generation kept producing a blonde Jenny because the agents were reading the text descriptions instead of looking at the actual approved turnaround. I had to go through and fix every reference across a dozen files. Lesson learned: the turnaround image is the only source of truth for character appearance. Always.
Attempt 2: Scene-Specific Turnarounds + Better Model (Gemini 3 Pro)
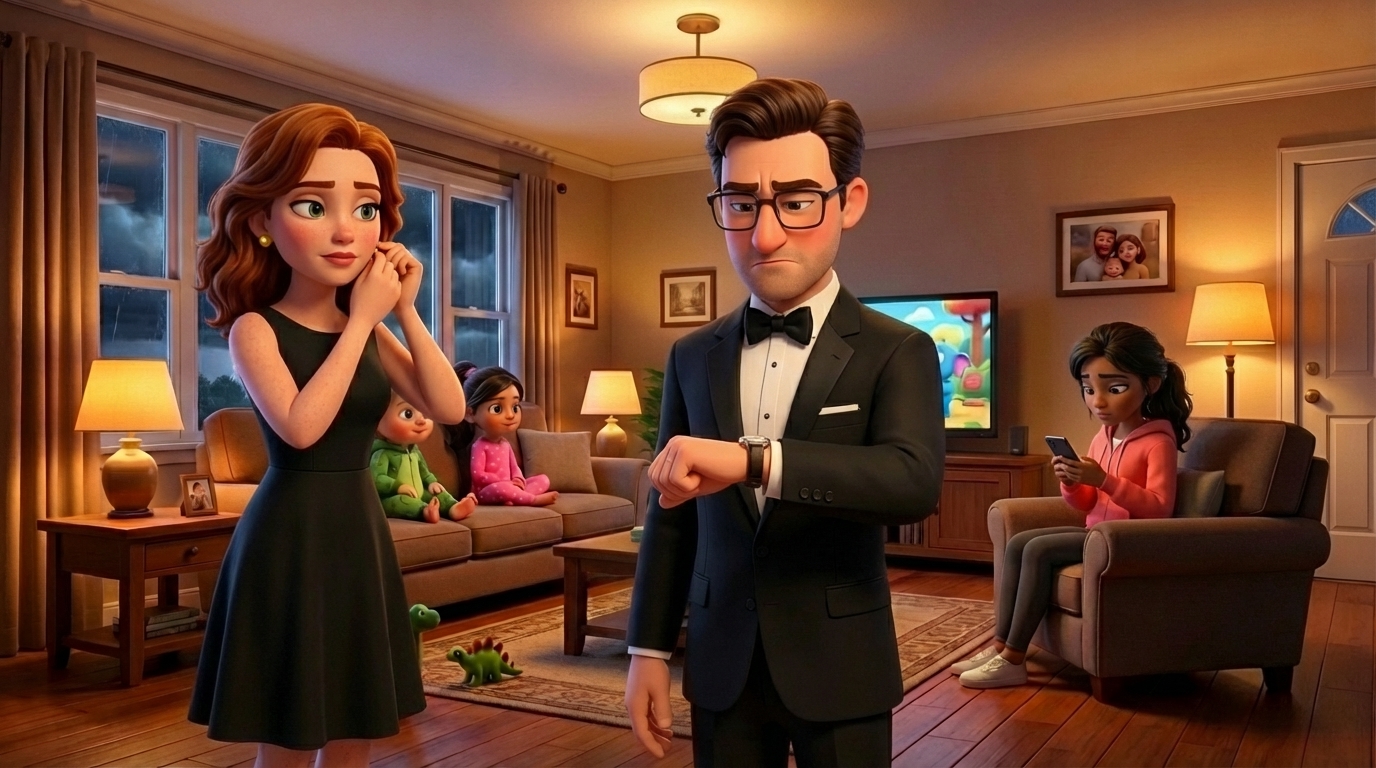
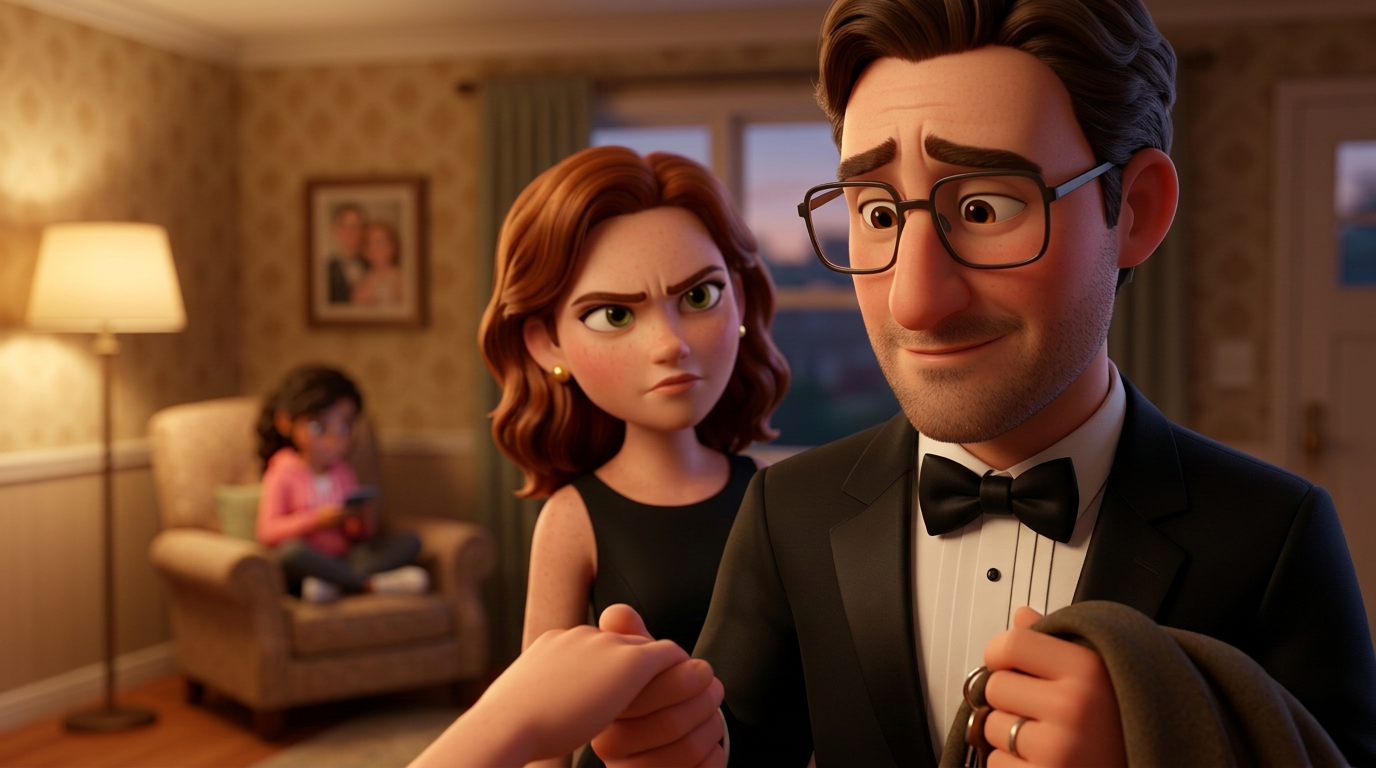
The next insight was that our characters' turnarounds showed them in casual clothes, but in Scene 1 the parents are dressed up for a gala. So Gemini kept generating Gabe in a flannel shirt (matching his turnaround) instead of a tuxedo (matching the screenplay).
Solution: generate scene-specific turnarounds first. Take each character's approved turnaround, use img2img to generate a new version wearing their Scene 1 outfit. Lock those in, then use them for all panel generation.
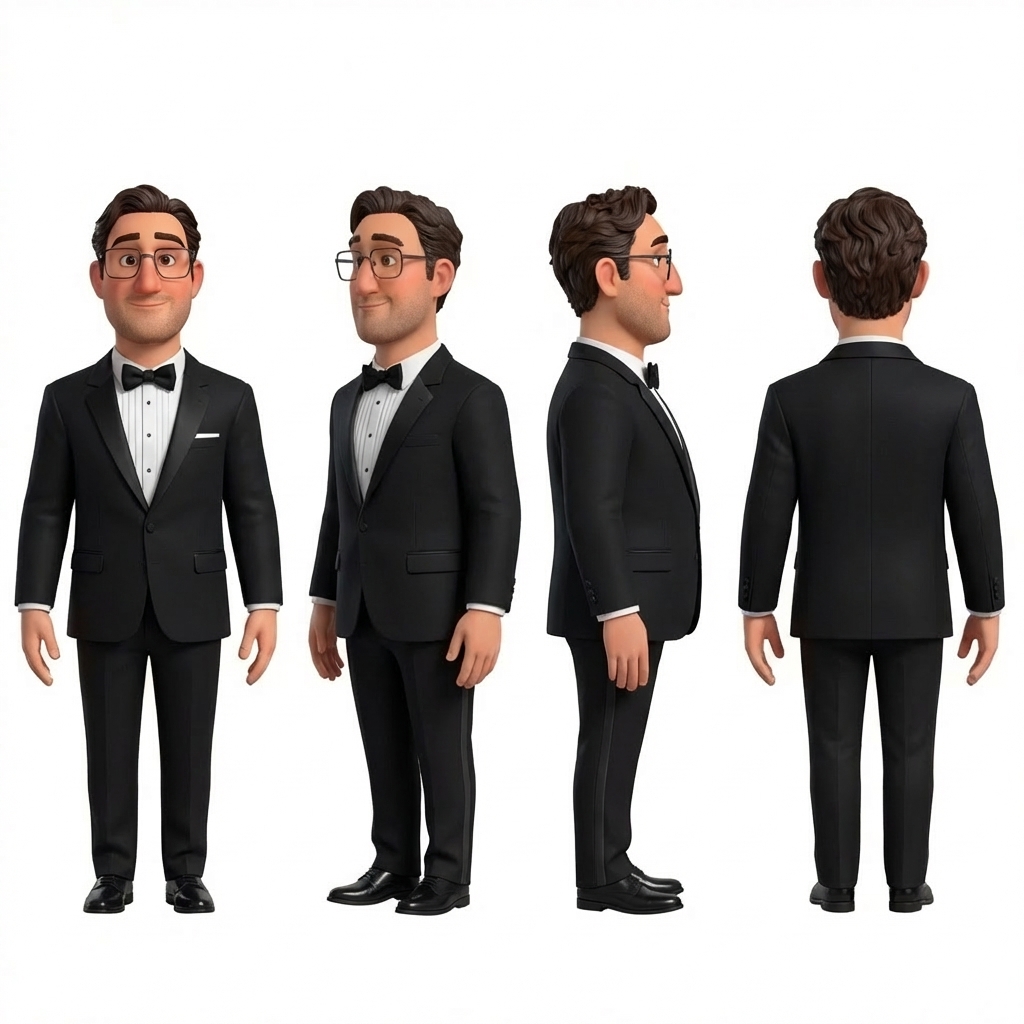
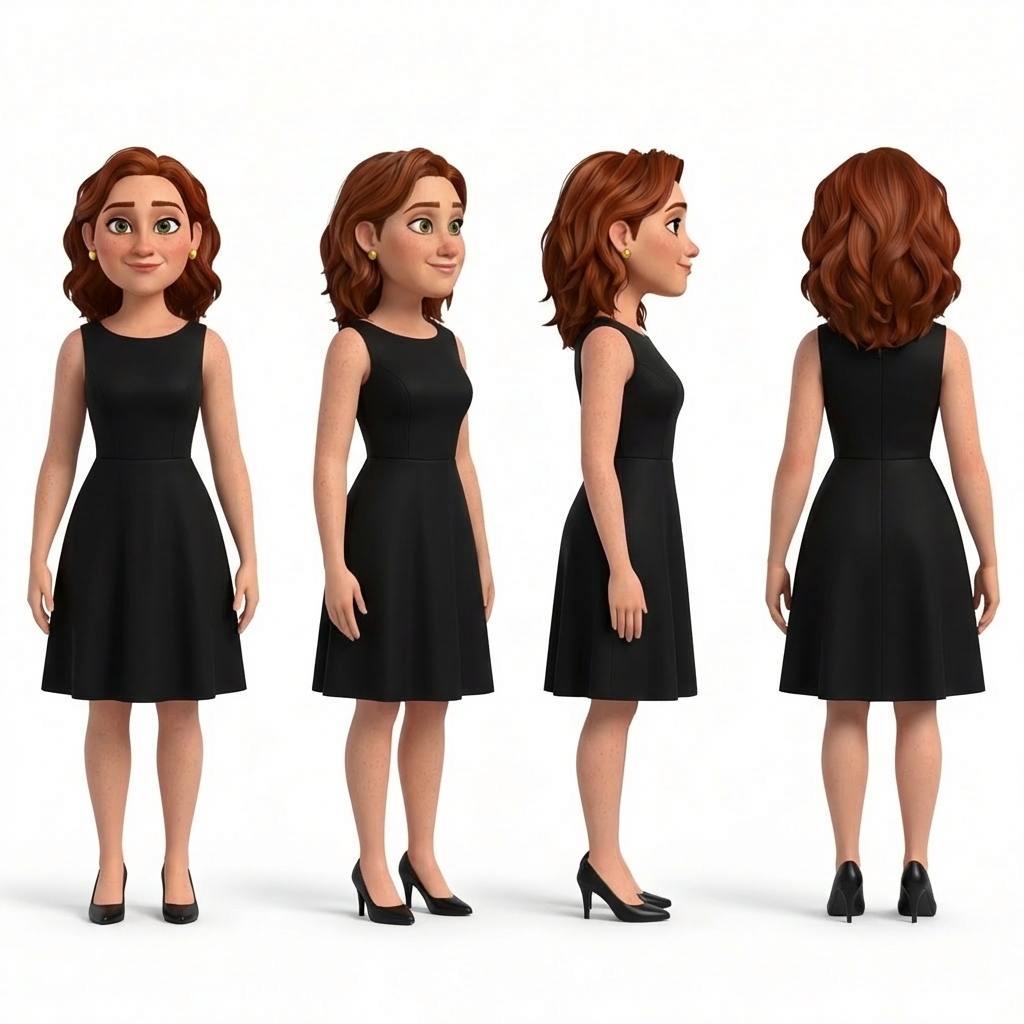
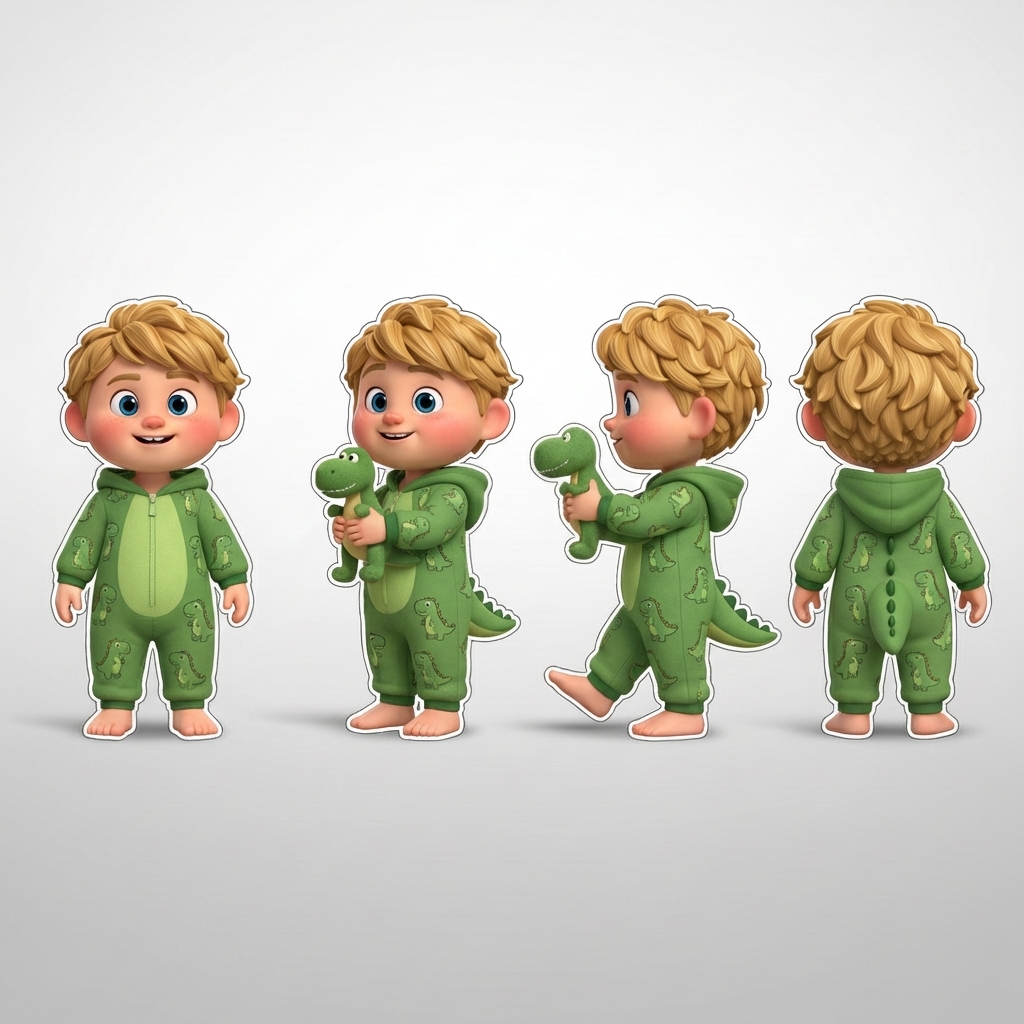
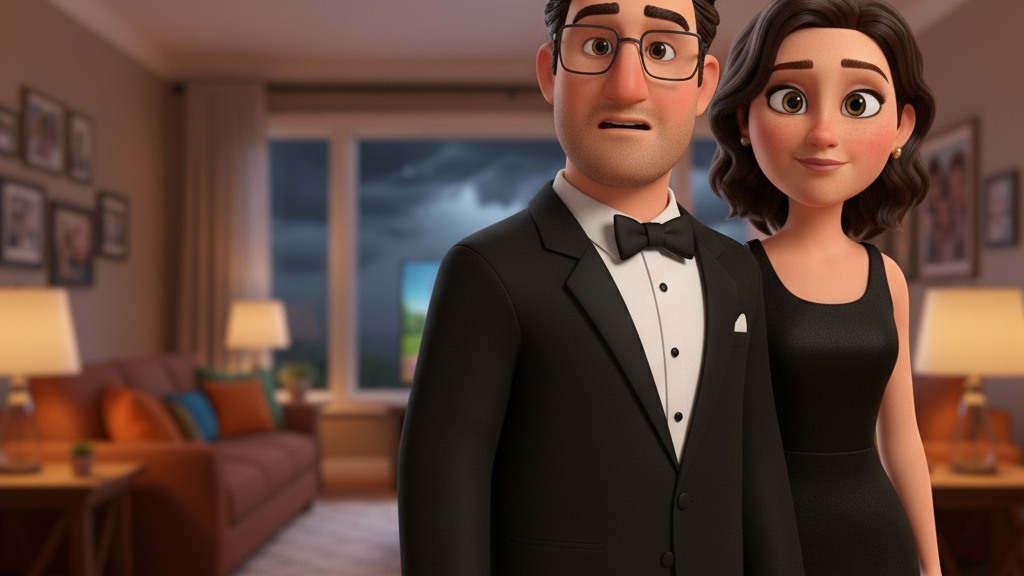
Scene-specific turnarounds: Gabe in tuxedo, Nina in black dress, Leo in dino pajamas. Generated from the approved turnarounds.
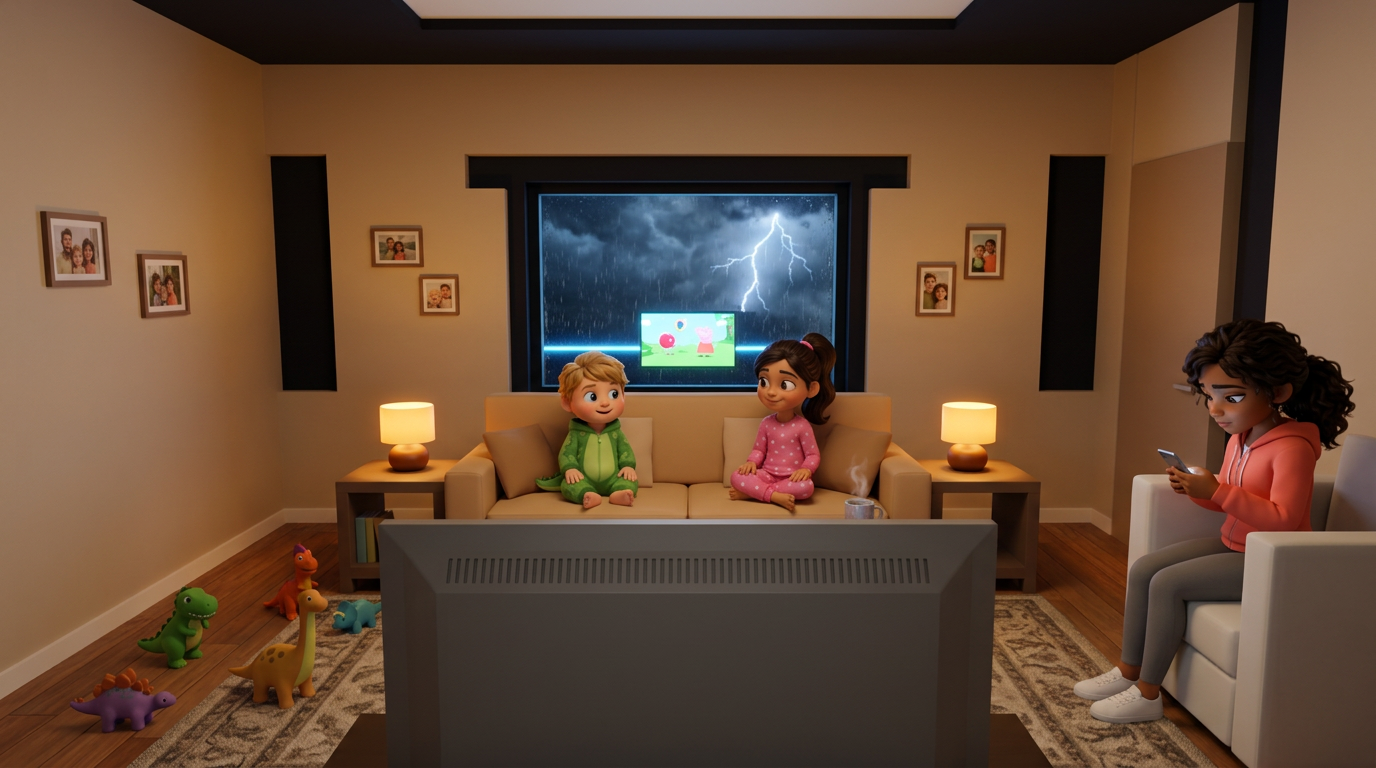
This actually worked really well. We also switched from Gemini 2.5 Flash to Gemini 3 Pro Image Preview, which outputs native 16:9 and significantly better quality. The close-ups were beautiful:
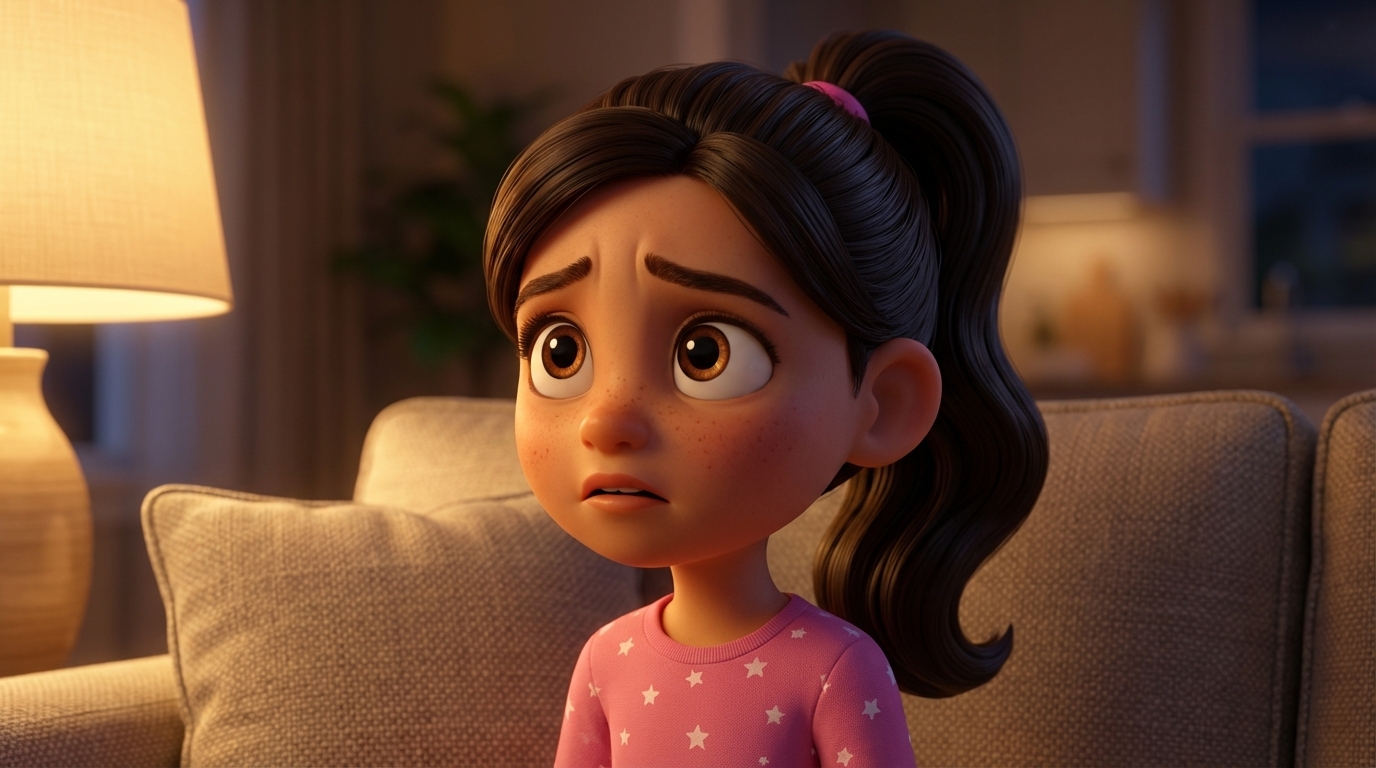
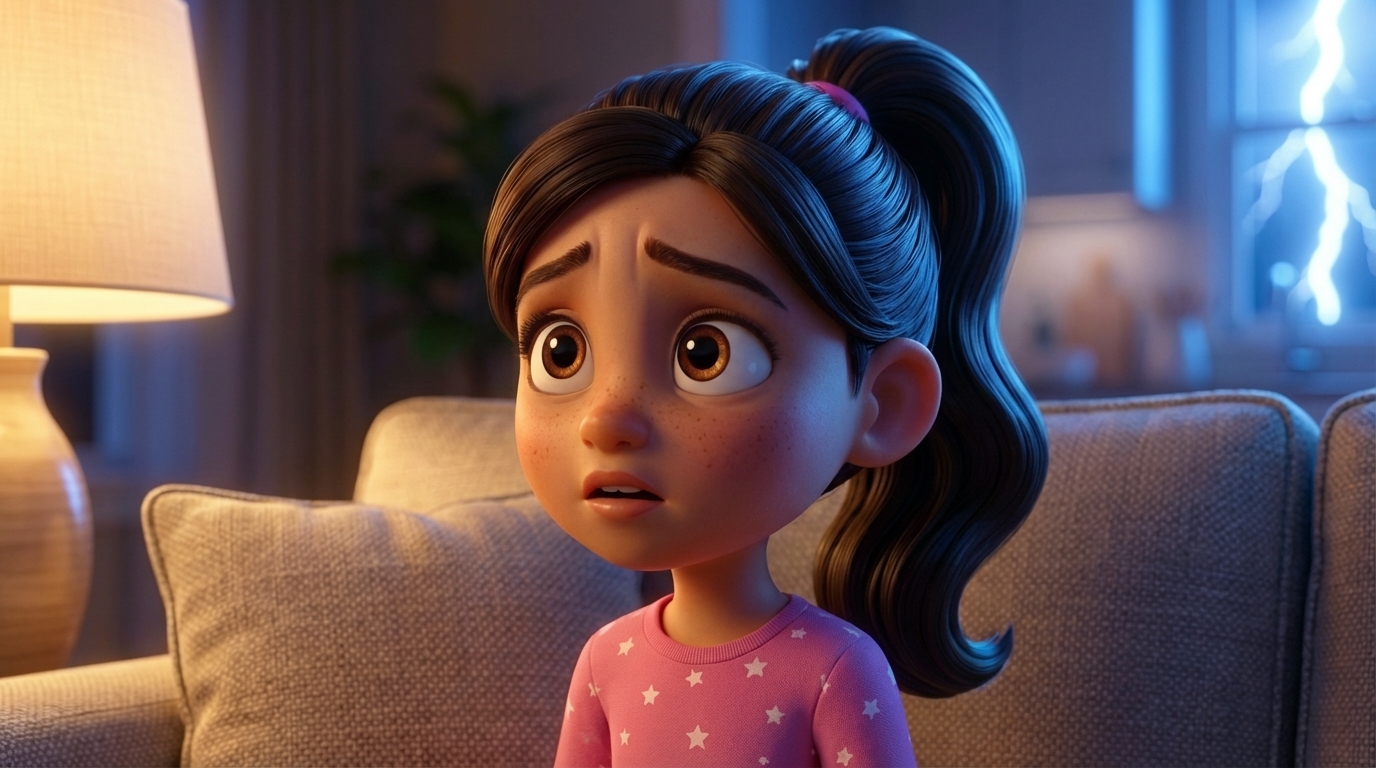
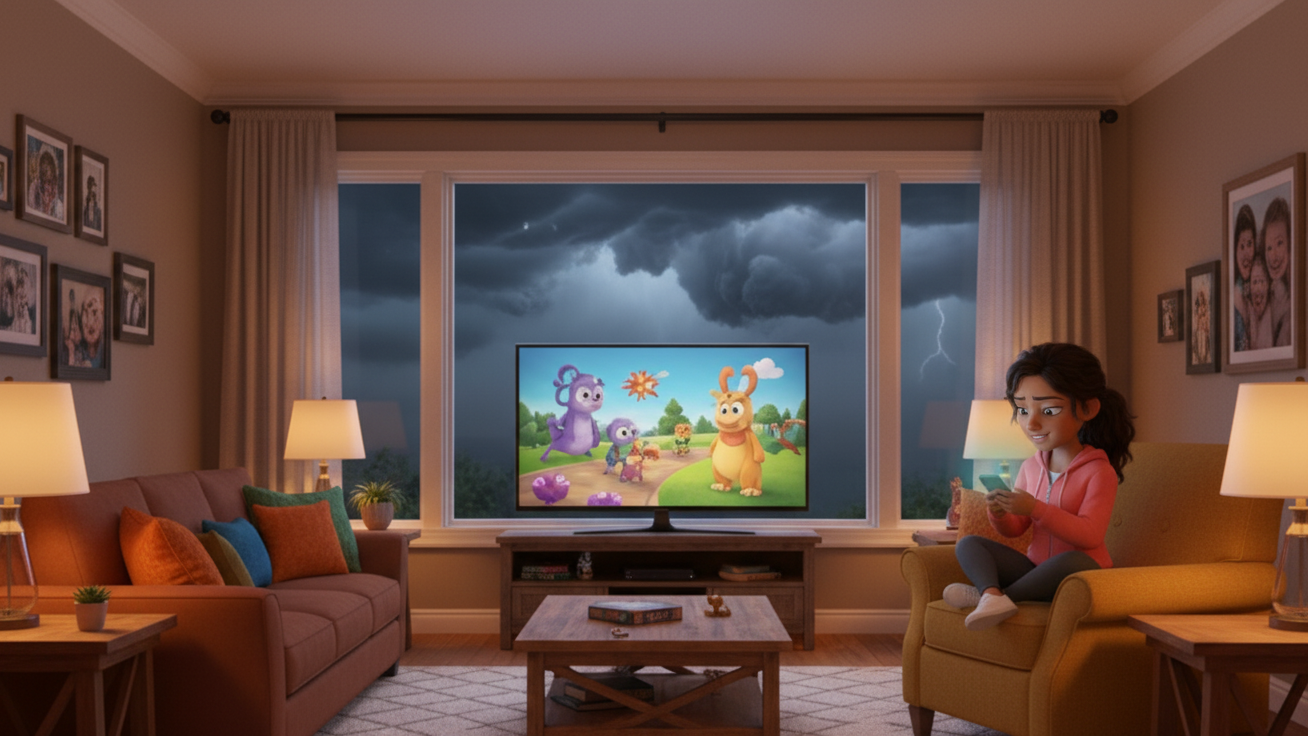
Mia's close-up. Start frame: worried expression. End frame: pleading, with lightning. Same character, same angle. This works.
The Consistency Problem
But while individual panels looked good, the scene as a whole didn't hold together. Each panel was generated independently, so the living room looked different in every shot. Furniture moved. Walls changed color. Characters that should be visible in the background disappeared. One panel showed the kids on a completely different couch.
I tried everything to fix this:
- Environment locking: Generate a hero establishing shot first, use it as reference for every subsequent panel. Helped, but the model still drifted.
- "Reproduce with one change" for end frames: Instead of generating end frames from scratch, pass the start frame and say "make this exact image but change one thing." This was the single biggest improvement for start/end consistency.
- Scene context in every prompt: Every prompt described the full room with all characters, even for close-ups. This stopped characters from disappearing but added new problems (extra children, duplicate characters).
After multiple rounds of feedback and fixes, some panels were great. But the wide shots and reverse angles kept breaking. The model simply doesn't have a spatial understanding of the room. It doesn't know that the couch faces the window, or that the TV is on the right wall, or that when you flip the camera 180 degrees the furniture should be in mirrored positions.
Panel 04: Gabe and Nina two-shot. The "reproduce with one change" approach gives tight start/end consistency. But does this room match the establishing shot? Not really.
Attempt 3: Blender Layout Mockup
I realized we needed to give the model actual spatial information. Not a text description of a room — a 3D reference.
So I had an agent build a simple 3D mockup of the living room in Blender. Basic primitives: box for the couch, boxes for tables, rectangles for the TV and window, colored shapes for character stand-ins. Set up 8 camera angles (front wide, reverse, medium, close-ups, etc.) and rendered snapshots.
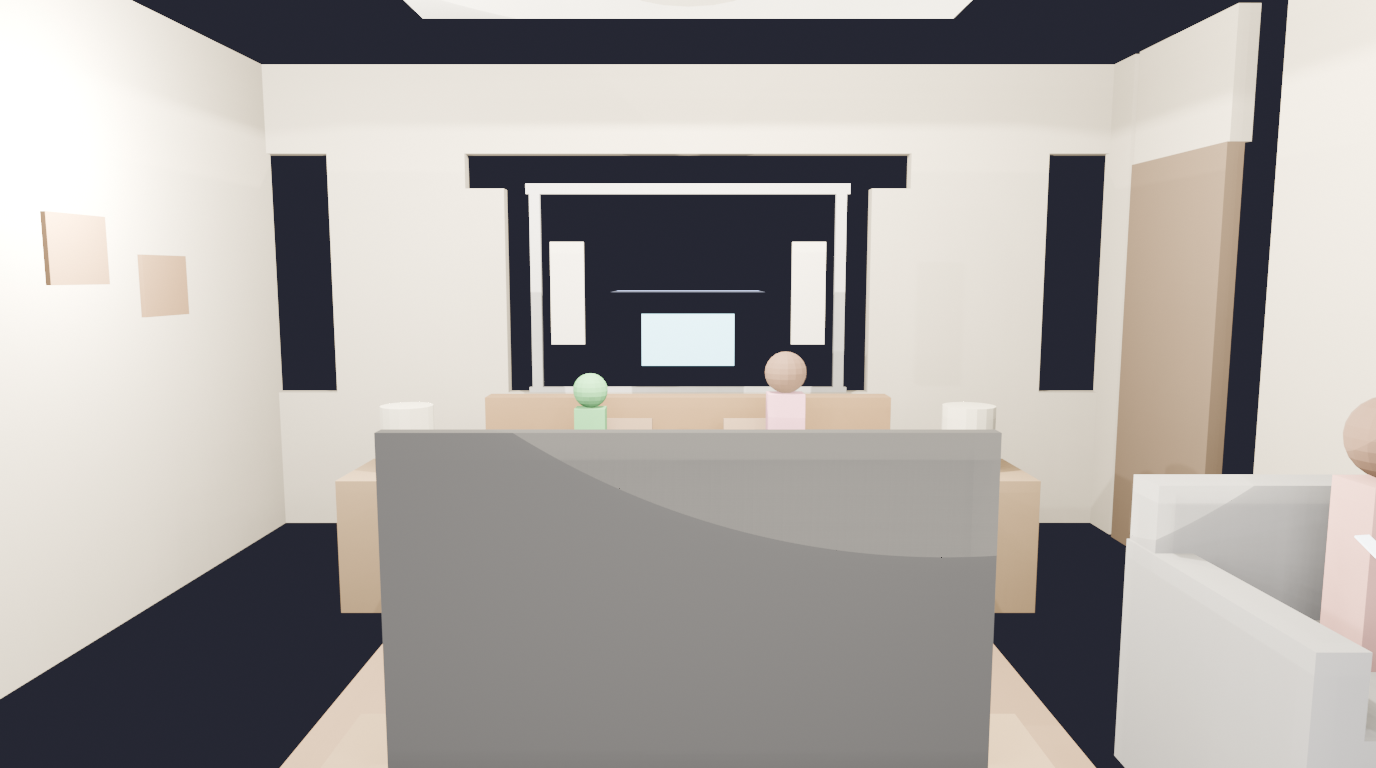
The Blender layout mockup. Ugly on purpose — it's a spatial reference, not art. Green = Leo, pink = Mia, coral = Jenny.
The idea: feed this to Gemini along with the character turnarounds and say "transform this layout into a Pixar-style frame, replacing the stand-ins with these characters."
Attempt 4: ControlNet (the ComfyUI Detour)
I also tried using ControlNet — extracting depth maps from the Blender renders and using them to constrain image generation through SDXL on Replicate. In theory, this should give perfect spatial locking because ControlNet uses the actual 3D depth information, not just "vibes."
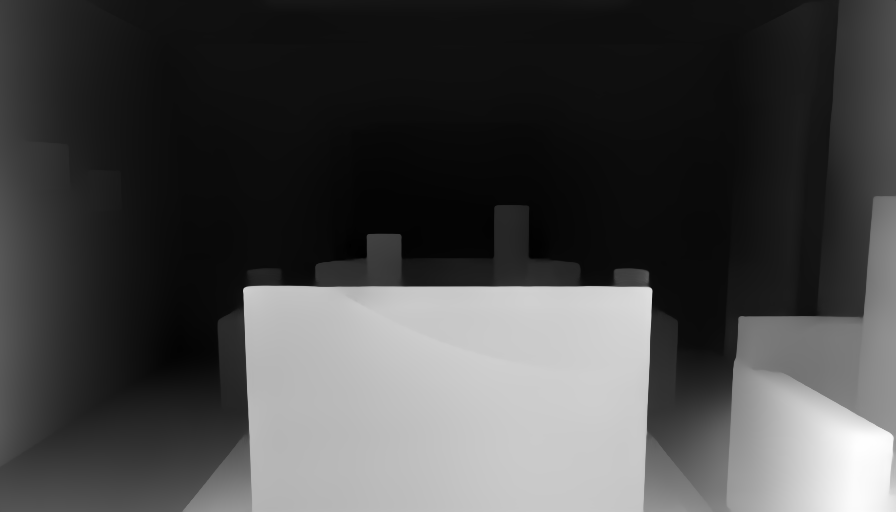
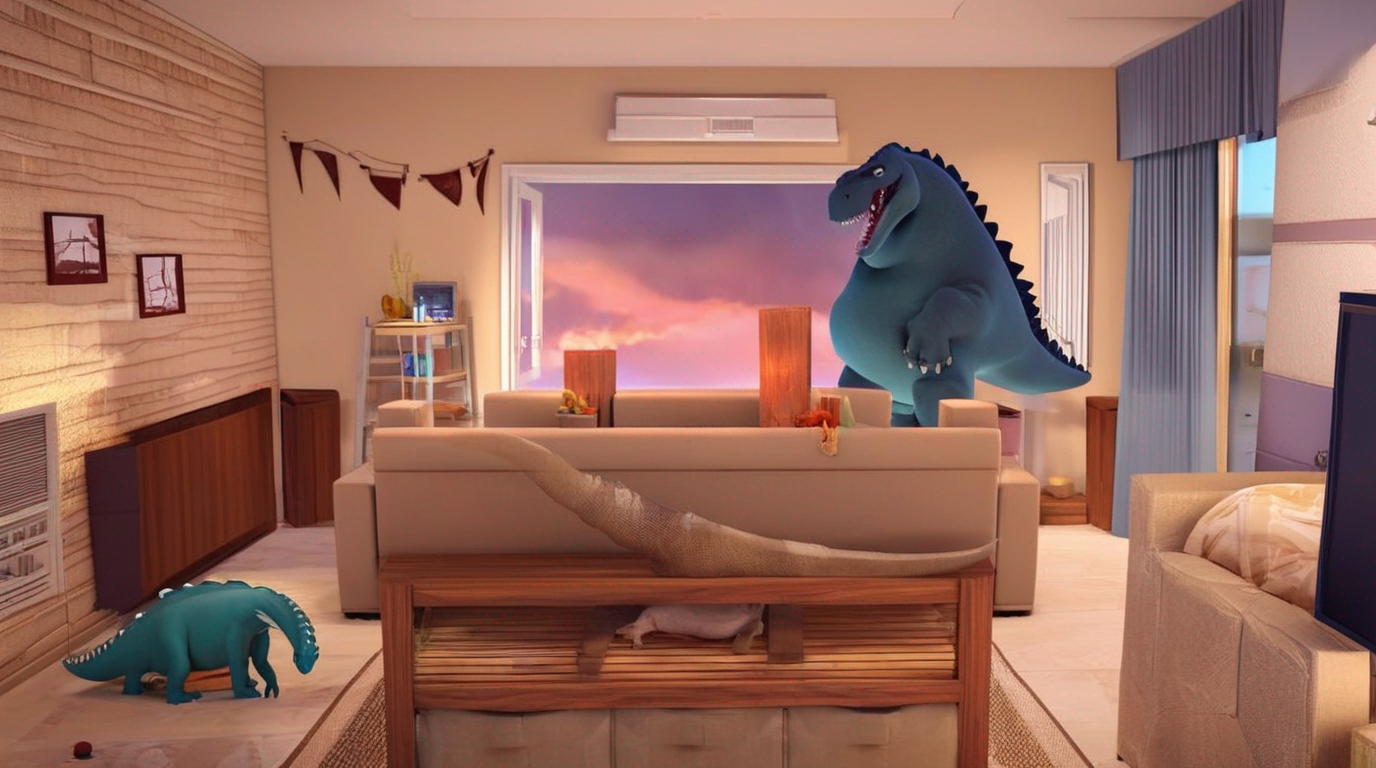
Left: MiDaS depth map extracted from the Blender render. Right: ControlNet generation using that depth. Spatial structure is preserved but... that's a dinosaur on the couch.
The spatial locking worked. The style didn't. SDXL base model doesn't do Pixar well, and we couldn't get a good fine-tuned checkpoint loaded. I also tried to self-host ComfyUI on RunPod, but the GPU pod had CUDA driver issues, then RunPod had no GPUs available at all. Classic cloud infrastructure fun.
What Actually Worked: Blender + Gemini
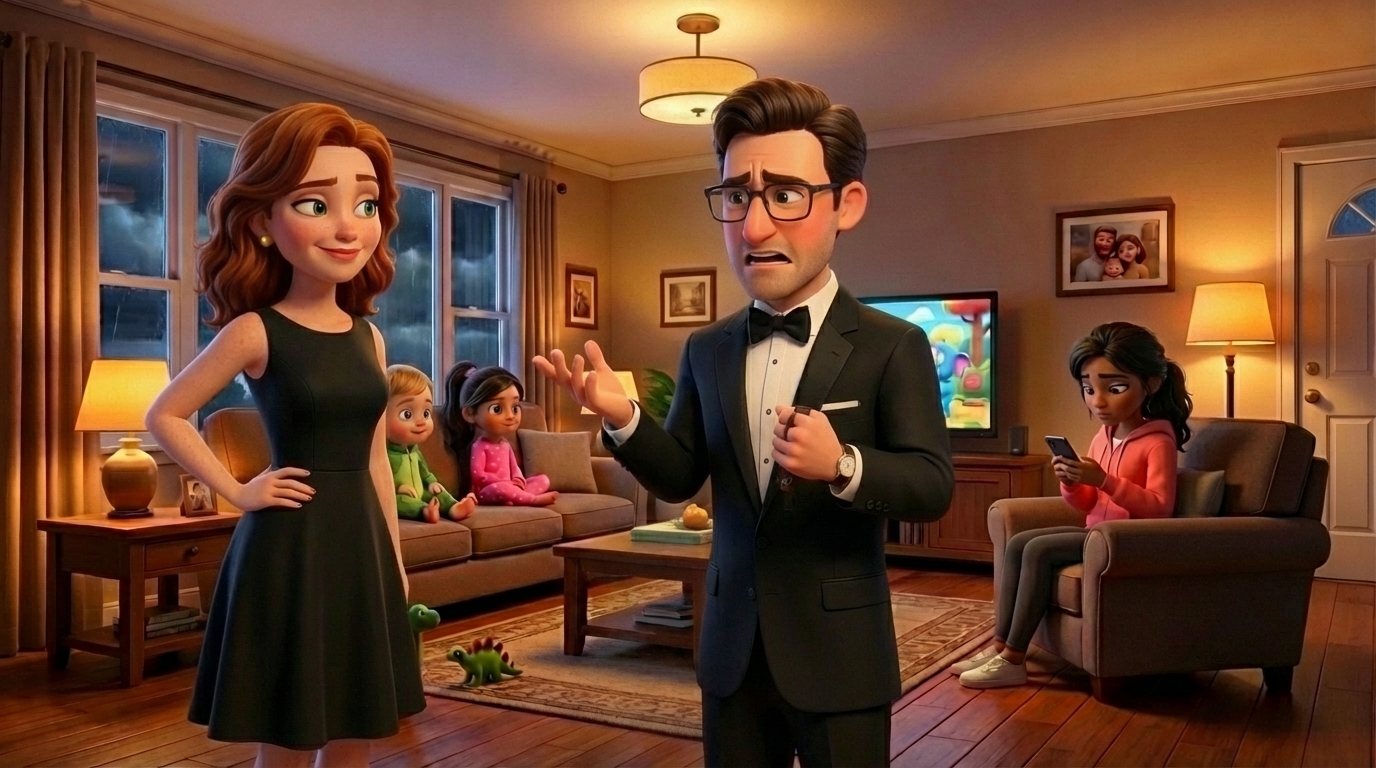
In the end, the simplest combination won. Feed the Blender layout render directly to Gemini 3.1 Flash as an img2img reference, along with the character turnarounds and a detailed prompt. Gemini understands "transform this mockup into a Pixar frame" much better than "imagine a room that looks like this text description."
Left: Blender mockup. Right: Gemini 3.1 Flash transformation. Same spatial layout, now rendered in a Pixar-ish style with actual characters.
Here are a few more panels from the final v4 batch:
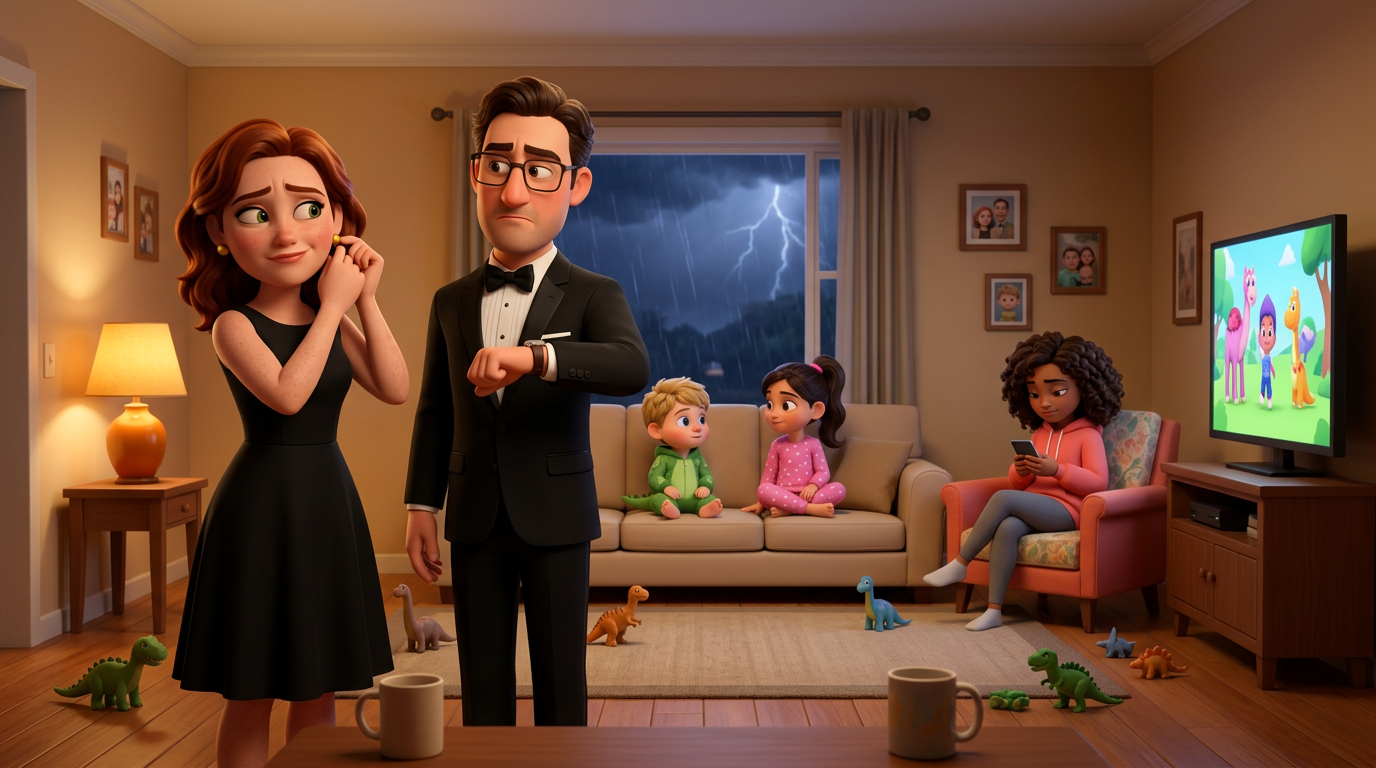
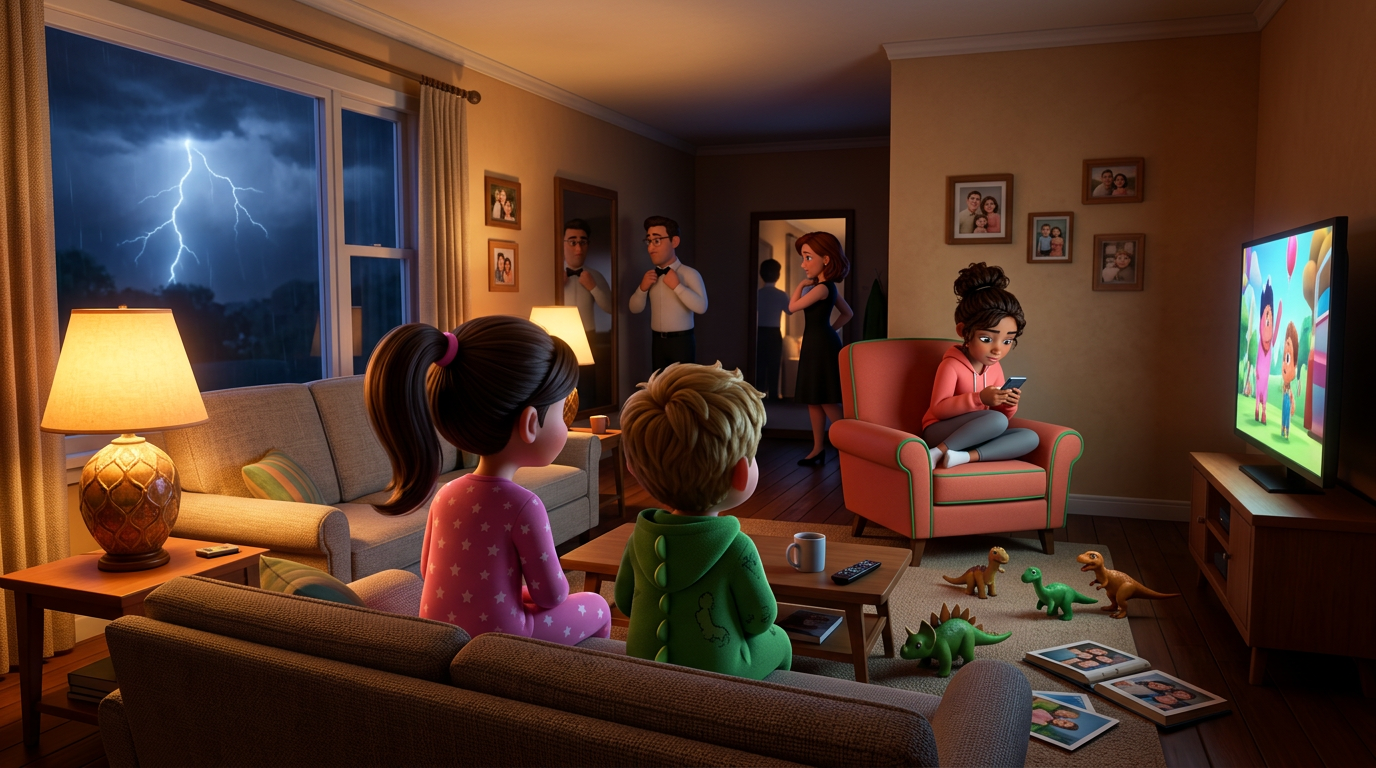
Left: Parents two-shot with kids and Jenny in background. Right: The reverse angle OTS shot — the one that kept breaking for hours — finally working with spatial grounding from Blender.
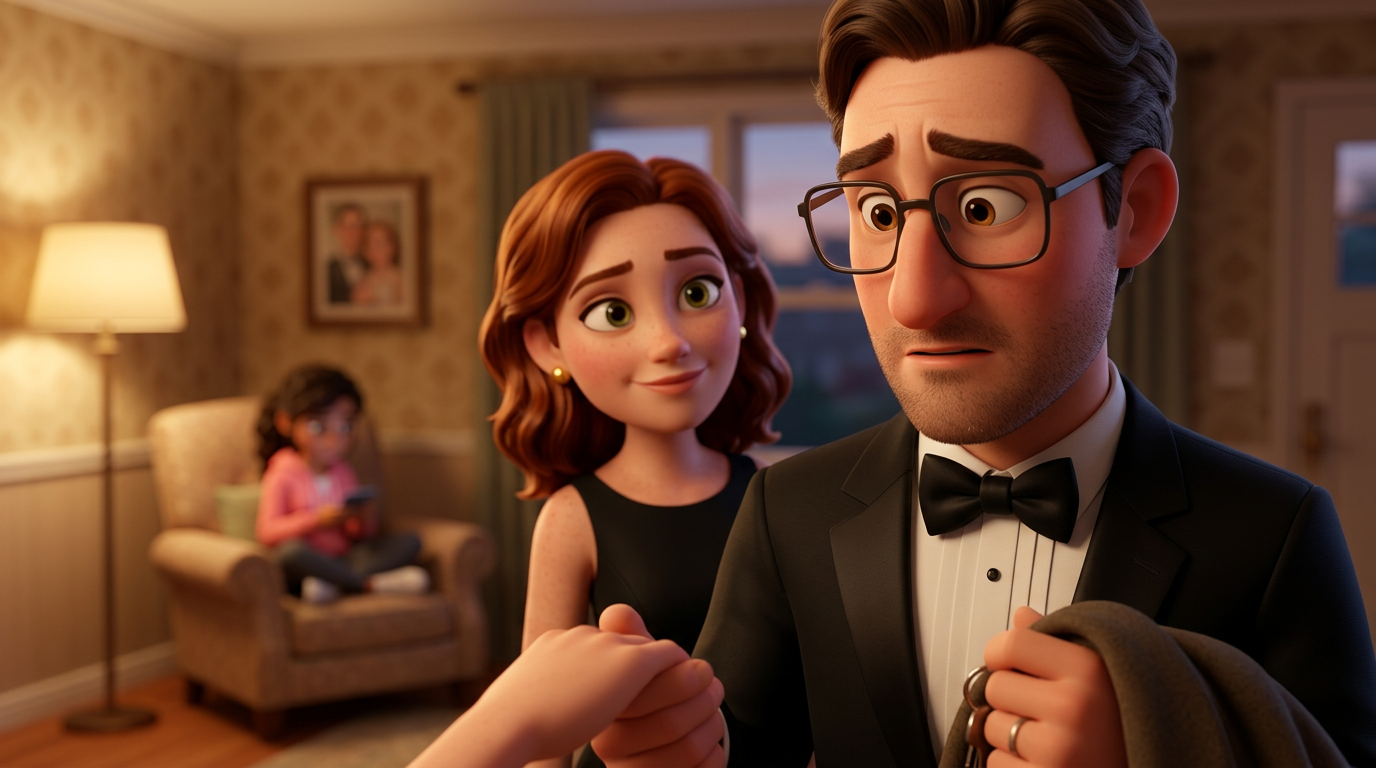
Panel 09: Gabe and Nina. Start: hesitation. End: "Promise." Same composition, expression change only. The "reproduce with one change" technique.
Is It Good Enough?
Honestly? No. Not yet. The quality is better than anything we've produced before, and the pipeline is significantly more robust. But there's still character drift between panels, the backgrounds aren't perfectly consistent, and some shots just don't match the turnarounds well enough. For video generation input, these need to be tighter.
But I learned a ton today about what works and what doesn't:
Lessons Learned
- Scene-specific turnarounds are essential. Don't make the model guess wardrobe from text. Generate turnarounds in the correct outfit for each scene, then use those as refs.
- Turnaround images are the only source of truth. Text descriptions go stale. The approved image is what matters.
- "Reproduce with one change" beats generating from scratch. For start/end frame pairs, always pass the start frame as input for the end frame and describe only what changes. Massive consistency improvement.
- AI image models have zero spatial understanding. They can't maintain a room layout across different camera angles. You need external spatial grounding — in our case, a 3D Blender mockup.
- Gemini 3.1 Flash > Gemini 3 Pro for this use case. Higher detail, richer rendering, and it handles the Blender-to-Pixar transformation better.
- Empty room first, characters second. Establish the environment before placing characters in it. Reduces the chance of the model hallucinating extra furniture or people.
- Build a review tool. I built a simple HTML annotation tool where I can click on panels to leave feedback. It's crude but it cut the feedback loop time in half. Building a proper Cloudflare Workers version next.
The Pipeline (for now)
- Approved character turnarounds (locked)
- Scene-specific turnarounds (wardrobe for each scene)
- Blender 3D layout mockup (spatial grounding)
- Blender camera renders from each shot angle
- Gemini 3.1 img2img: Blender render + character turnarounds → Pixar-style frame
- "Reproduce with one change" for end frames
- Director review and annotation
- Targeted regeneration of flagged panels
Tomorrow I'll keep iterating on this pipeline. The Blender mockup needs more detail (the humanoid stand-ins helped but they're still crude), and I want to explore rendering actual depth maps from Blender for ControlNet once we get the RunPod situation sorted. The ControlNet approach showed real promise for spatial locking — it just needs a better style model underneath.
One scene down. Thirty-six to go.